Andrew made this battery powered robot to demonstrate motion made from household supplies for the Boy Scout Engineering Merit Badge. I love scouting! Merit badges are like mini high school courses with a seasonal reward ceremony. Here is his $1.00 robot he made with the motor from a battery operated toothbrush from the Dollar Store. The rest of this post is Andrew written. Here is how to make a robot!
By Andrew
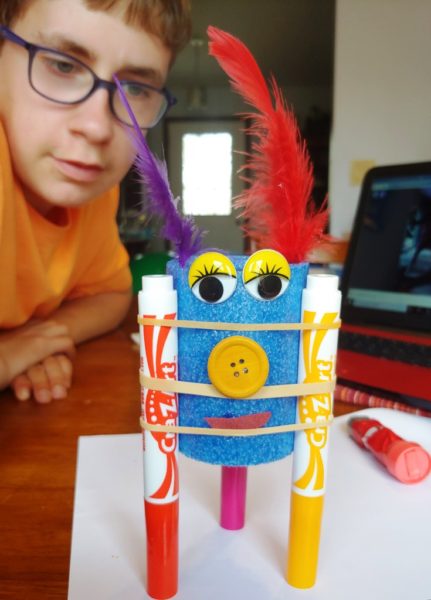
How to make a Robot from a $1.00 Battery Powered Toothbrush
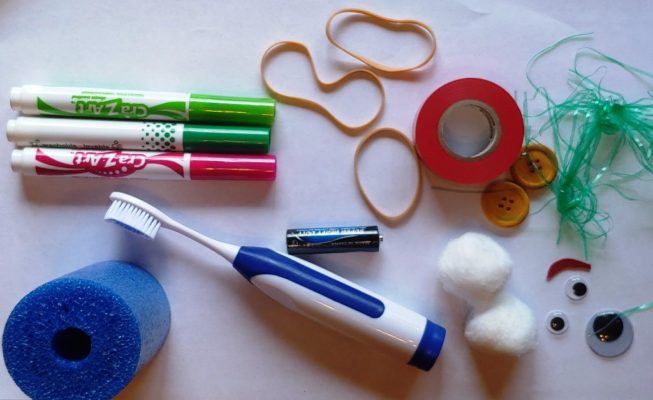
Supplies
- A battery powered toothbrush from the Dollar Store
- 3 inch piece of pool noodle
- Decorations (Google eyes, feathers, buttons, etc)
- Hot glue gun
- Electrical tape
- AA battery (If it didn’t come with the toothbrush)
- Three thick rubber bands
- 3 or 4 markers (washable is best)
Note from Mom** An adult should always help with a hot glue gun. I keep a cold glass of water near by. If hot glue gets on fingers or if you accidently touch the tip of the glue gun, you can immediately immerse the area into cold water. It will harden the glue so that it can be removed with minimal abrasion. The initial reaction is to take a swipe at hot glue as soon as it touches skin- this smears the area and makes the burn larger. I repeat this safety lesson each time the hot glue gun gets plugged into the wall!
Ready? Follow the steps below.
To make a robot start with these two items.
Buy a battery operated toothbrush at the Dollar Store. You might as well buy more than one because you can make all kinds of robots with them. My Crayola Scribble bot is only one type. You can make robots from many type of materials, however in this case, you will need a 3 inch pool noodle. You can also purchase pool noodles at the Dollar Store during spring and summer.
The artwork
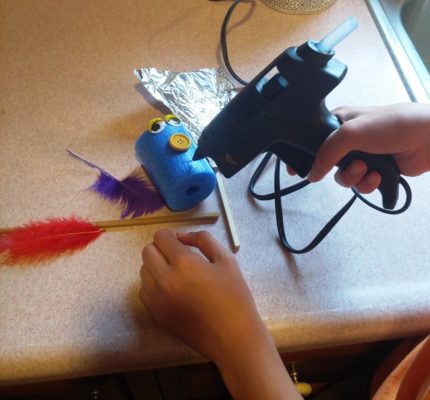
Robots with silly faces or dressed up are crazy. Find odds and ends of decorations to use for your robot around the house. You will need to use a hot glue gun to hold the decorations to the pool noodle. School glue and a cool glue gun did not work for us. When you have all this assembled, create a personality for your robot!
How to remove the battery from the tooth brush.
When the artwork is finished, it is time to make a robot. Look closely at the toothbrush. The ‘on and off switch’ is at the opposite end of the toothbrush part. Keep the toothbrush end portion, because it can be used to make a different type of robot. (Future post!) Of course, you could also use it to brush your teeth the old fashion way – where the power comes from your hand.
Pull off the bottom of the toothbrush. This is the area where you will either find a battery or you will insert a AA battery. Look up inside the toothbrush and you will see a spring. Behind the spring is a motor. Tap the toothbrush end on a hard surface until the battery unit and motor falls out.
How to tape the battery together.
If the battery compartment and the motor comes apart you can easily put them back together by making sure that the side prongs fit in the slots on the battery.
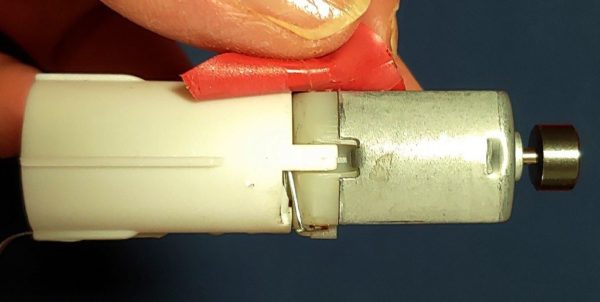
Hold these two pieces together and wrap them securely with electrical tape. You might ask for help. Another pair of hands holding the two pieces are easier than holding and taping by yourself.
Putting the Components Together
Next insert the battery. The negative part (the flat end) always gets pushed against the spring. Push the on/off end of the toothbrush container onto the positive end of the battery. You will know if it is in the ‘on’ position because the motor will vibrate, and the spinner at the top will spin. If this happens, flip the switch to ‘off’. I noticed that even when it is off, there is still a bit of vibration at first, but it stops quickly.
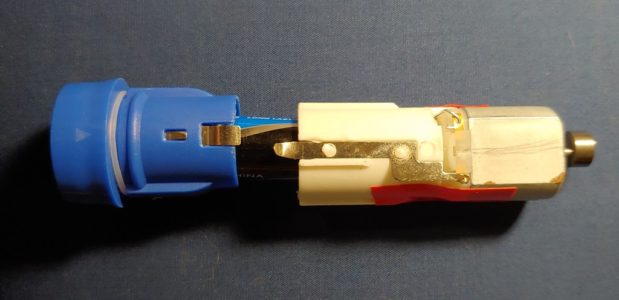
The metal ends of each piece must touch. This will complete the circuit when you push it together. Flip the switch to ‘on’ and see if the spinner rotates, if it does, you have completed the power circuit and your robot will be able to move about. Tape this center section together. The whole component is now held by tape and you can control it by using the on/off switch.
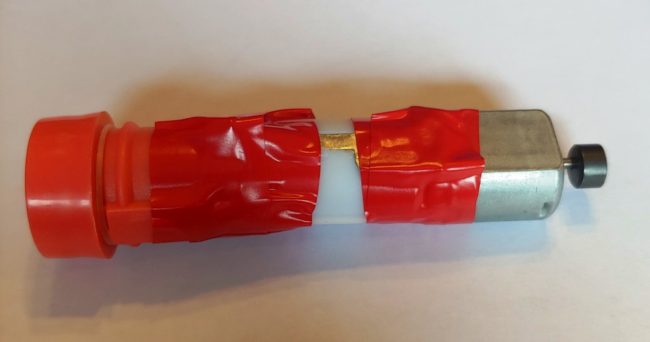
Insert the taped motor into the hole in the center of the pool noodle. If if is too tight, use a knife to shave the hole bigger. You should probably make sure you have an adult with you. Push it down inside so that only the end of the on/off compartment shows.
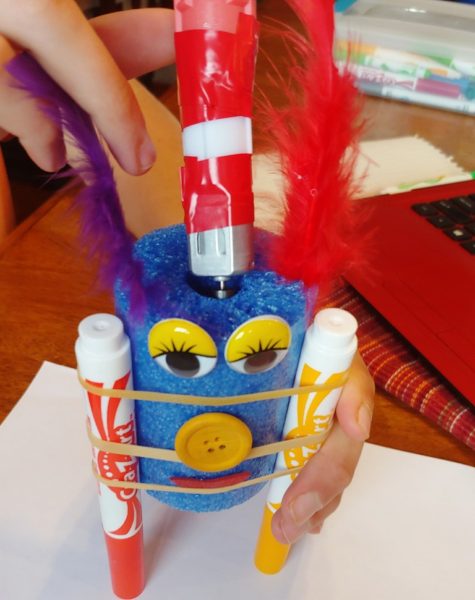
Give your robot drawing skills!
Stretch three thick rubber bands around your robot, but be careful not to ruin your decorations. Place one at each end and one in the middle of the pool noodle. When the rubber bands are positioned, take your markers and push them underneath the rubber bands making sure the marker tips point down. If you use three markers position them at 12, 4, and 8 – as if you were looking at a clock face. If you choose to use 4 markers, position them at 1, 5, 7, and 11.
** Just incase your robot decides to take an adventurous path off of the paper, use water based markers. It makes clean up easier and moms won’t freak out.
Ready?
Remove the caps from the markers and turn on the robot!
Here is the Science behind the Motion
By Danielle
If you examine the toothbrush you bought from the Dollar Store you will see that it is not complicated. The power source is a simple battery. A circuit is a path where an electric current can flow in a continuous movement. Any breaks in a component stops that flow. The motor has a little spinner, called an oscillator on the end. When powered, this oscillator spins, making the tooth brush vibrate – or a robot move. Here’s a picture explanation. The electrical circuit starts at ‘A’ and continues all the way around to ‘K’ and finally back to ‘A’, where it starts over.
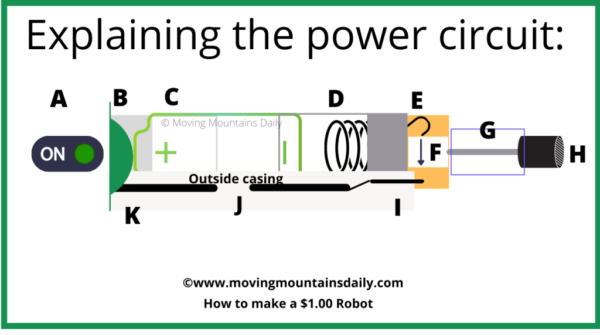
Explaining the Power Circuit
- A. The on/off switch completes the circuit so that power can flow, OR when ‘off’, it breaks the circuit, and stops the flow of power from the battery.
- B. The on/off switch when ‘on’ pops up a little piece of metal so that it touches the battery or power source. This allows the electrical circuit to flow. If the switch is ‘off’ the little piece of metal does not touch the battery which cuts the power.
- C. The battery is the power source that provides a push of energy (voltage) to get the circuit flowing.
- D. A small wire spring touches the negative end of the battery, and allows power to flow through the spring.
- E. The spring is hooked to a copper strip of metal.
- F. Power flows from the spring through the copper.
- G. The current does not flow upward through the axel to the oscillator. The axel turns because it is powered by the energy from the voltage.
- H. The rotating axel makes the wheel, or oscillator rotate. This causes the toothbrush to vibrate or the robot to turn in circles.
- I. The electric current leaves the copper metal, and it flows through the elongated piece of metal on the outside of the battery casing.
- J. When the battery casing is not pushed or taped together, the space between the metal pieces break the current. The current flows when the two pieces of metal touch so that the current can flow from I to K.
- K. The outside casing delivers the current to the power switch. As long as the power switch stays ‘on’, the current will continue to flow from one end of the battery powered component to the other end.
From Oscillator to Robot!
The oscillator spins so quickly that it transfers energy to whatever it touches. You can feel the energy, either in your hand or teeth, and it is the same energy that oscillates the robot in a circle.
We will be posting more STEAM and STEM posts for kids. Like this post? Become one of our subscribers and get the latest!


