Plants in the winter live off of their food stores. We know how plants make food, but where is this food stored and how is it delivered? In this unit, the investigative science labs will show how plants store and transport food and water. We will learn the secrets to survival and how the booming transportation industry keep green plants alive!
This post and lab will be easier to understand if you complete:
Photosynthesis, Investigate the Amazing Power of Plants
Dormant yet Alive
Thus far, we have learned that once the days shorten and there is less sunlight, the hardwood trees drop their leaves to conserve food and energy. Conifers slow down the production of food (photosynthesis), but hardwoods go dormant – yet they are still alive. Here is the inside story!

How Plants Store Food
During the warm seasons, when a plant produces more food than it needs, it converts the excess glucose (sugar) into starch for storage purposes. The starch is stored in the roots and in the seeds of a plant.
The starch contained in the seeds will feed the young seedlings as they grow. The rest of the starch is stored in the roots to feed the plant during the winter months, or times of drought.
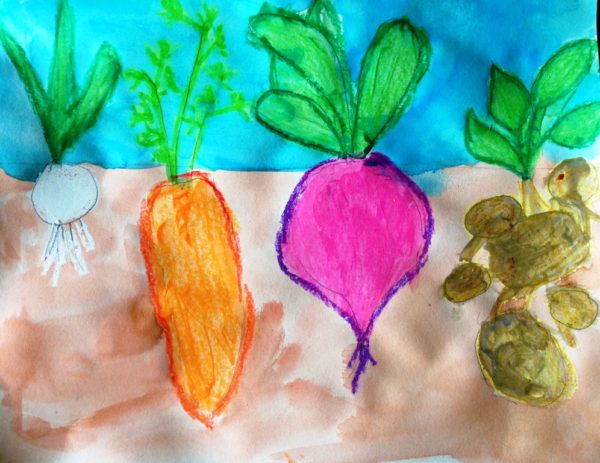
Root vegetables like carrots, potatoes, and radishes are considered starchy foods because the excess starch supply is stored in their roots. By storing excess food underground, root plants can protect their food stores from weather changes.
Moving Food: The Transportation Industry
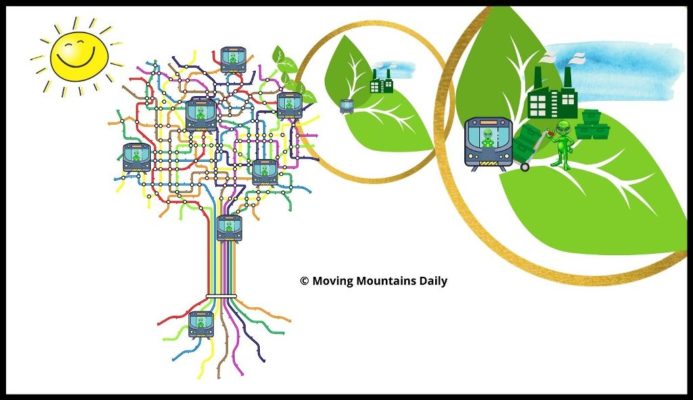
In order to complete the photosynthesis process, water must be moved from the roots to the rest of the plant. Likewise, food made in the chlorophyll factories need to be shipped to every part of the plant. It is no surprise that the transportation business is a booming industry!
There are many types of stems. Some are soft and green, others are hard and thorny. Trees, like Redwoods and Oaks are hard and tough, yet with all these differences, they share a common transportation network system. Within the stem, the transport of water, food and minerals occur naturally.
The Xylem and the Phloem
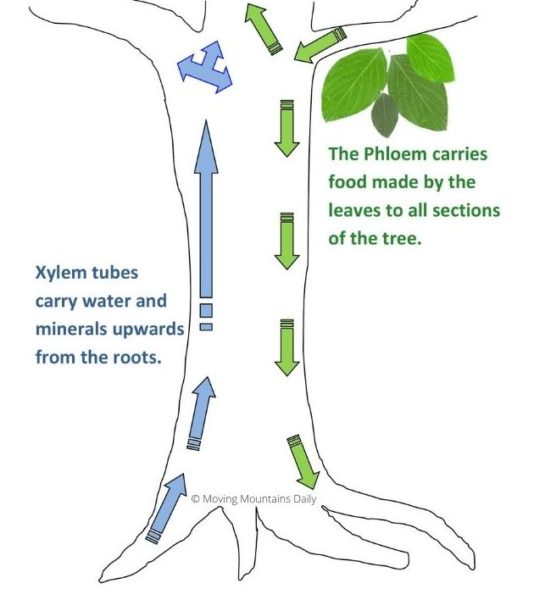
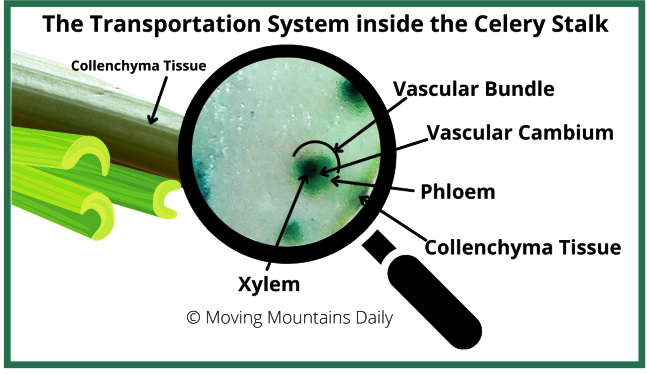
The xylem is a network of tubes that moves water from the tree roots upwards. For visual purposes you can think of these tubes like little straws in a bundle. But don’t get too comfortable with this thought, because trees do not have the capability of sucking anything upwards. The upward draw of water is similar to water flowing up a paper towel – there is no suction. We’ll learn more about this in a moment. For now, just remember that the xylem transports water ‘upwards’.
Similar to the xylem, the phloem is also a network of tubular tissue except the primary job is to moves food made in the photosynthesis process. The phloem can flow in all directions. A good way to remember the word phloem is to think of ‘flow’.
Vascular Bundles
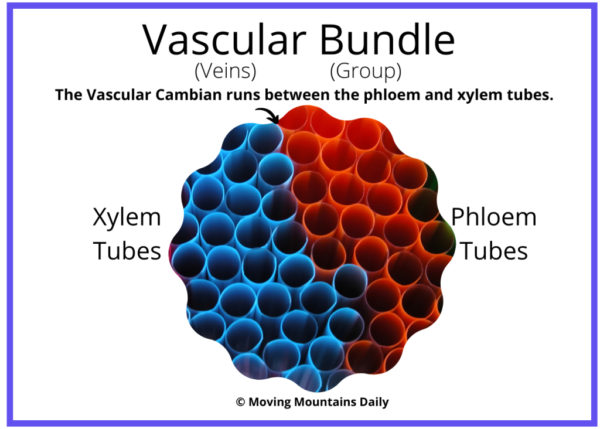
The xylem and phloem are organized within a system called vascular bundles. The two pipelines are separated by the Vascular Cambium, a strong, thin layer of tissue that supports the two layers and gives them strength.
If you look closely at a stalk of celery, you will notice ridges running up and down the stalk. Those ridges are called collenchyma tissues which make the celery ‘ridged’ – they are also the reason why celery is so crunchy!
Science Lab: Investigating The Xylem
Let’s explore the internal structure of a piece of celery. The main experiment will take two days, however, the content and other labs should be split into sections of 2-5 days. This will prevent information overload for teachers and students. The green buttons throughout this post will tell you what lab pages to complete at that time.
For this science lab you will need:
- Two stalks of celery with leaves
- Red food coloring
- Blue food coloring
- 4 clear glasses
- Table knife
- Water
- Magnifying Glass – optional but helpful
- Lab Worksheets
Free Printable Lab Sheets
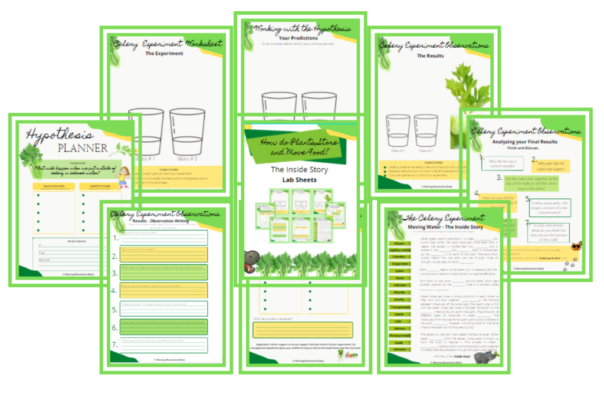
The free printable lab sheets will help students examine these complex systems found within trees and plants. Printing lab sheets will require a subscription. By subscribing, you will receive future information about any continuations of this post, future labs, printable lapbooks, living book reading resources, and other posts at Moving Mountains Daily.
Topics of the lab sheets include:
- Hypothesis Planner
- The Experiment
- Your Predictions
- The Results
- Analyzing the Final Results
- Observation Writing
- Considering the Evidence
- The Inside Story using Vocabulary
Lab Preparation
Day 1
Prepare your celery stalks by cutting a quarter inch off the dried flat ends. A fresh edge will be able to transport water easier.
Then cut (ask for adult help) the stalks from the bottom to the center – BUT don’t split the stalks apart!
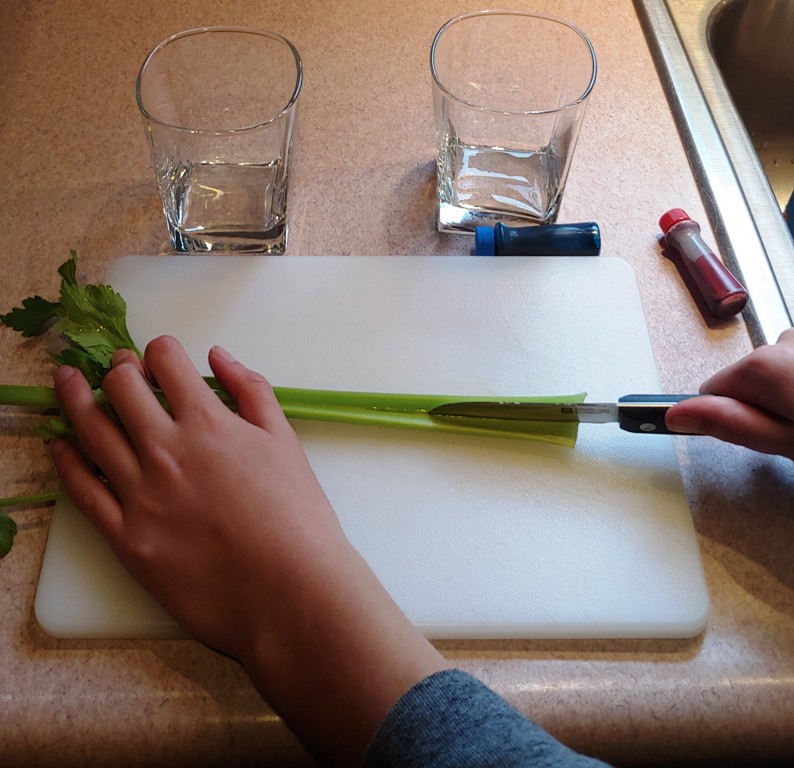
The Control Sample
Add water to two of the glasses and insert the first celery stalk, placing one leg of the stalk is in each cup. This is your control sample and it will not be subjected to colored water. Lean it against a wall or back drop to help support the height.
The control sample is part of the experiment that never changes. It offers a visual of what the celery looked like at the start of the lab and will help with comparisons and with analyzing final data.
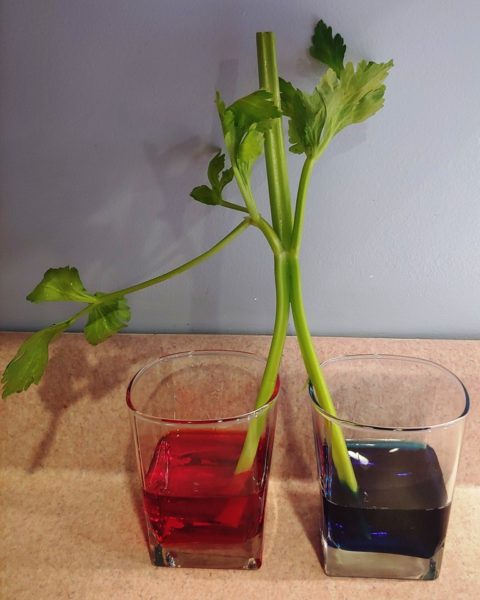
The Second Celery Stalk
Prepare the victim, I mean second celery stalk. Add water and 4-5 drops of food coloring to the remaining two cups and set them side by side. Place the unsuspecting celery stalk into each glass and lean the stalk against a stable backdrop.
Just for the record, the celery doesn’t care what the water contains, it will drink whatever type of water is available. Researchers have taken notice that plants not only naturally clean the air, but they filter and clean water too.
You can check the celery stalks every few hours but the final results won’t be observed for 24 hours.
Create your Hypothesis
With the celery enjoying a lovely drink of colored water, you can now write up your hypothesis. Remember a hypothesis is an educated guess at what you think will happen. By formulating a hypothesis, you are using the knowledge you already know, in order to reason what you think will happen.
I like to tell my students to use the “if….. then…. because….” method. If we do this in the lab……. then I think this will happen…… because…. (this is what I know or have learned thus far.)
The idea is not to try and make your hypothesis correct, but rather to show what you know (or don’t know). In the end, the results and your observations will either support your hypothesis and prove you know what you are talking about. Or your hypothesis might prove that you were a bit ‘off’ in your thinking and will redirect your thought process.
The following lab sheets will help you organize your hypothesis statement, what you have learned thus far, and analyze the data from your experiment.
Before continuing:
Day 2
The results are in!
You probably noticed over the last 24 hours that the celery in the colored water started to change with in a few hours. Lab sheets 4- 6 will direct you through the observations and analyzation processes.
Up Close and Personal with Celery
On a cutting board, use a knife (with help from an adult) to make a cross section of the celery stalk. Observe closely. Draw your observations of the section and then do the same with the leaves and stems.
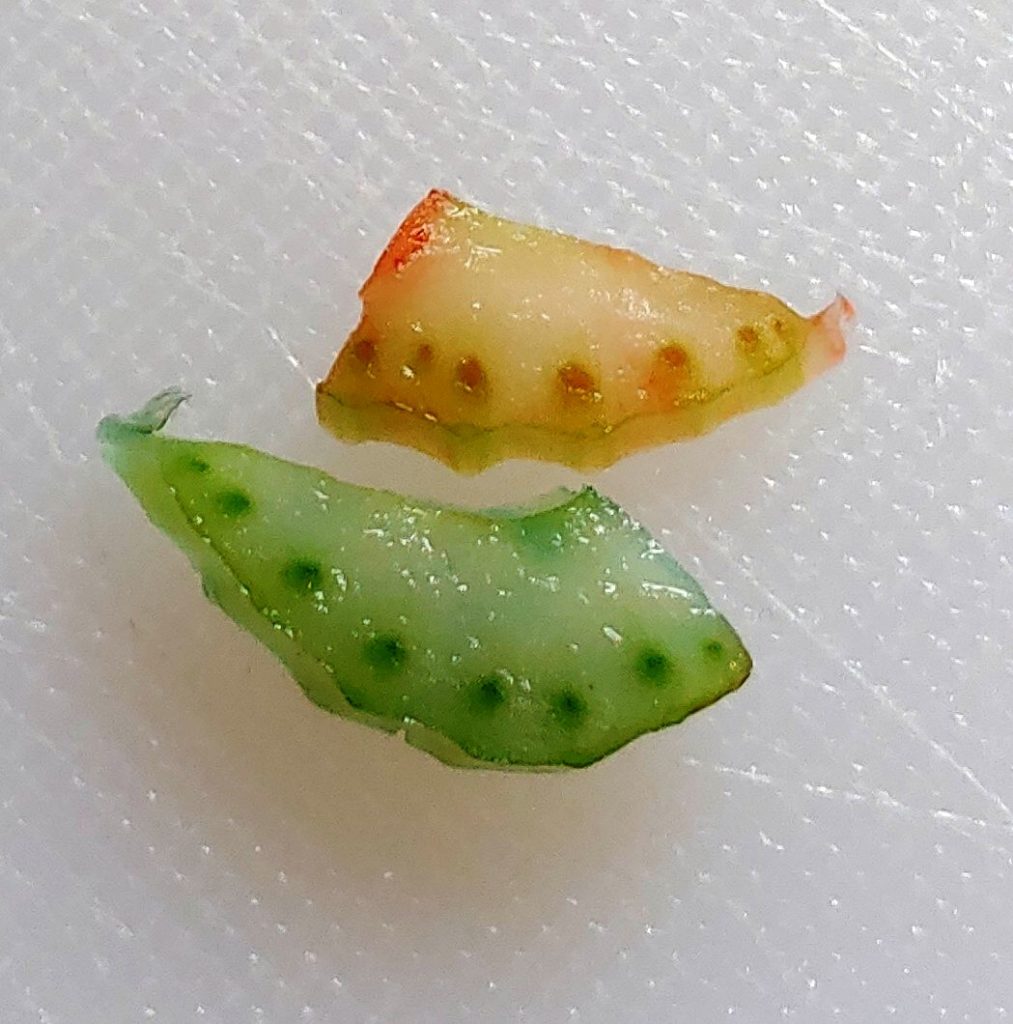
When looking at the cross section, the most obvious visual is the small dots running along the edge of the celery. These are the xylem tubes that moves the water upwards from the roots, or in this case, the water in the glass.
I took the cross section image and cut it lengthwise trying to cut through the little xylem dots. Here’s a cross section of the xylem tubes. They even look like straws!
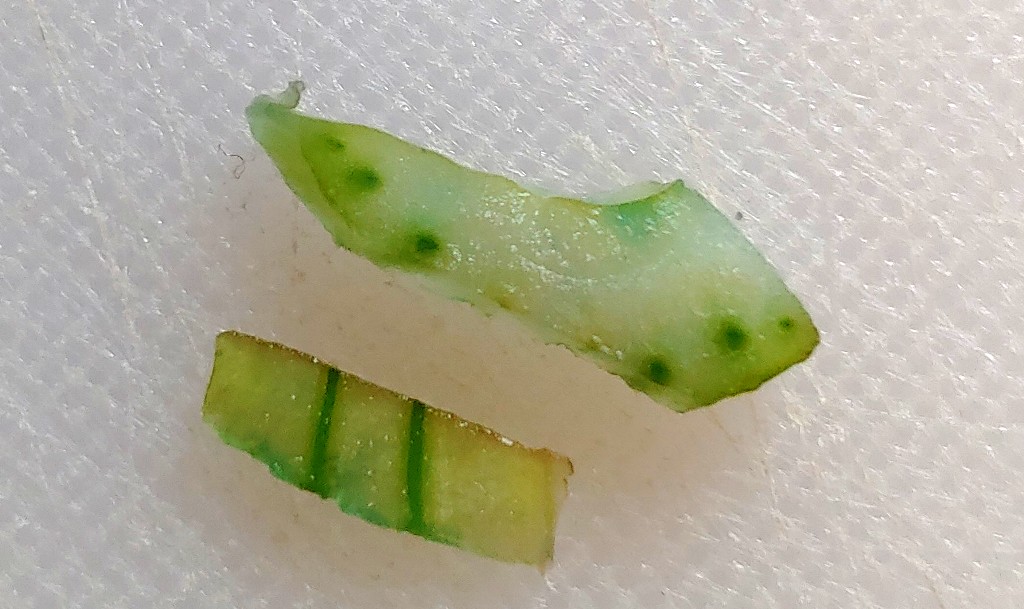
Celery Dissection
Notice the title says, “Celery Dissection”, it does not say “Celery Mutilation”! You can do that after the lab is over!
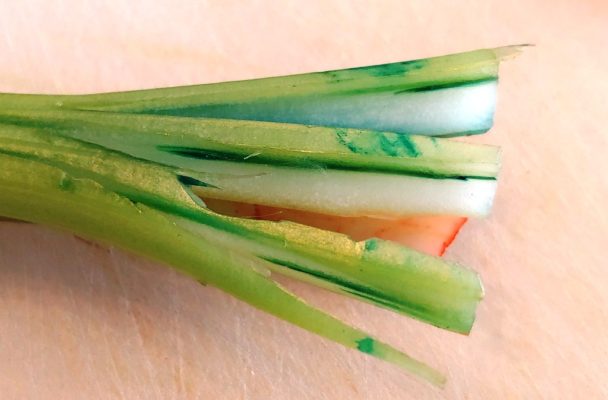
I gave the knife to Andrew to see if he could dissect the xylem tube all the way up the stem. It took a few cuts, but he found a good view of a xylem tube.
If you have a difficult time exposing a xylem tube, an adult, with a sharp knife, can help delicately shave some tissue away . Andrew stayed focused and located a lot of xylem tubes!
Let’s revisit your hypothesis.
How Plants Moves Food without Suction
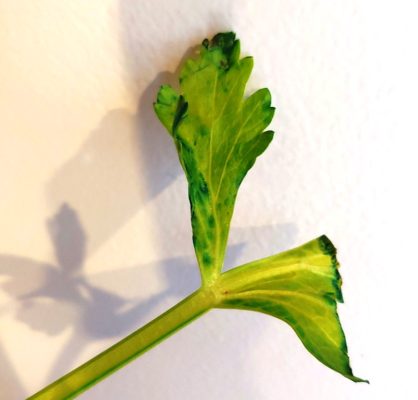
Our celery lab provided evidence that the water did some traveling just by looking at the discolored leaves. If you compare the discolored celery from the control sample you can see why we used colored dye. The colored water allowed us to see a science process that is typically invisible!
The xylem works like little straws, except the fluid doesn’t move upwards by way of a sucking motion. There are two processes that work together to get water to the top leaves: capillary action and transpiration. Both move water but by different methods and from different areas.
Capillary Action
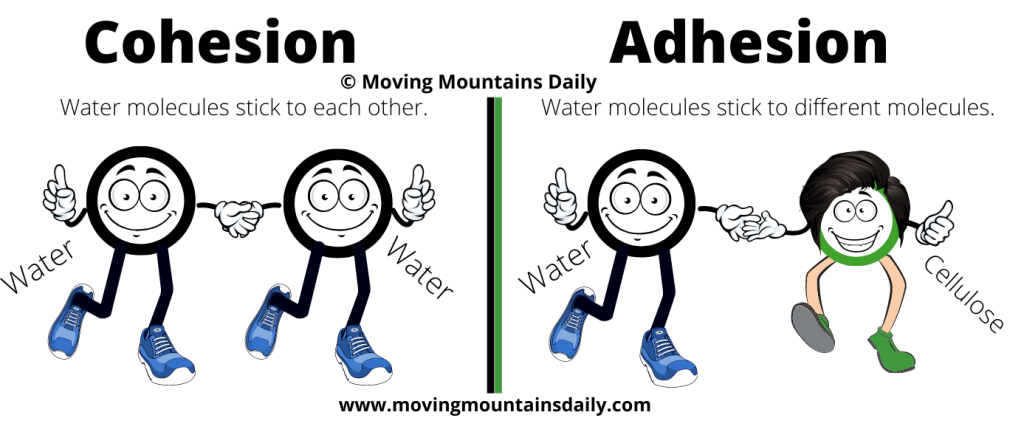
Capillary action begins at the roots. When ground water is absorbed through the hairs on the root system it gets transported upwards by the xylem pipeline. Capillary action takes place because of several scientific processes. To understand how water moves upwards in the xylem, we have to look at some terms called: cohesion and adhesion.
Cohesion
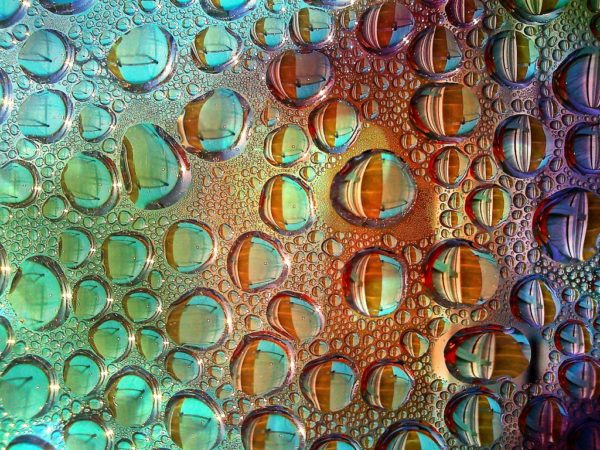
Water molecules like each other. So much so, that they will cohere or stick together. If you really want to get science-y, this stickiness is because of the Hydrogen bonding – or cohesion. The water droplets in this photo are sticking together. On a surface like this, you can take your finger and push the water droplets together and they will make a bigger droplet. Try this yourself by putting droplets of water on a piece of wax paper then move them together with your fingernail. All this puddling is caused by cohesion!
Adhesion
Did you try moving water molecules around the wax paper? Did you notice your finger got wet? This is because some of those pesky water molecules left their friends (other water molecules) and adhered to your finger. This is called adhesion.
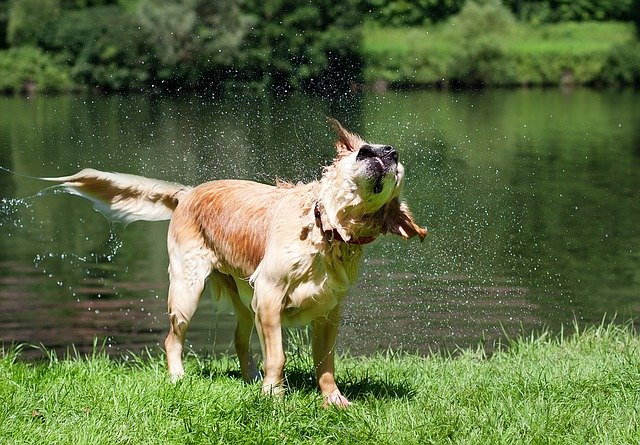
Water is sticky because water molecules stick to other non-water molecules. It sticks to your hair molecules after a shower and it sticks to soil molecules in the ground creating mud. Your dog has to shake to remove sticky water from it’s fur. Then you have to dry off with a towel, because the sticky water your dog removed, adheres, or ‘sticks’ to you!
Ummmm, you know those water droplets you just played with on a wax paper? Science is suppose to be fun, so smack ’em with your hand and watch where they decide to stick! (For the record, I did not tell you to do that.)
Capillary Action
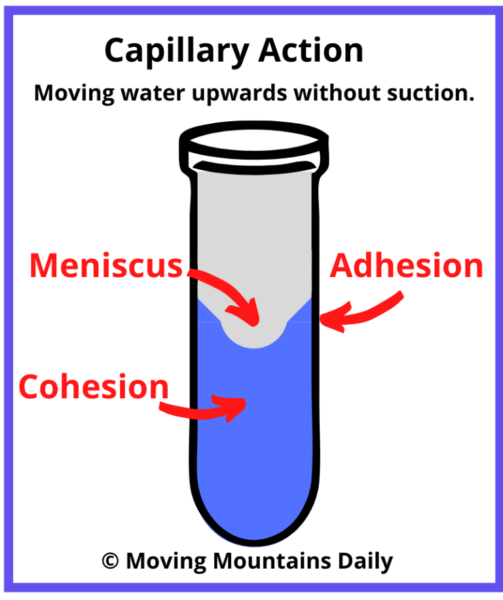
I know we said that water likes other water molecules, but sometimes they really PREFER other types of molecules – like the molecules that are on the side of the xylem tube (or in a glass tube). The molecules on the side of the xylem tube are called cellulose molecules. Water and cellulose create a stronger attraction than water/water molecules.
Imagination Station
Imagine: Water molecules being pulled towards the edge of the xylem tube because the adhesion bond is stronger than the cohesion bonds with their watery friends. The stronger attraction causes chaos so the water molecules bump, collide, and climb over each other to get to the side.
Imagine that you can see water Molecule A reaching back to help water Molecule B climb upwards, who reaches back and pulls up water Molecule C, who reaches back and – well, you get it. Before you know it the water molecules begin climbing the xylem tube wall. This upward motion against gravity is called capillary action.
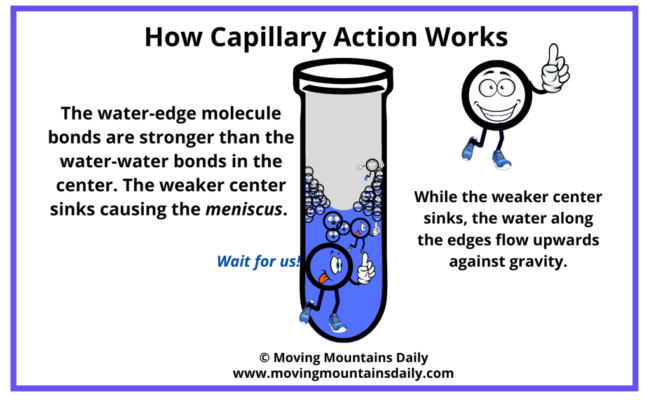
A Summary of Capillary Action
The bonds between the water molecules and the cellulose molecules (adhesion) on the edge of the xylem tube are stronger than the water molecule bonds (cohesion) in the center of the tube. This causes the molecules in the middle to become weaker and causes the water level to sink in the center. The sinking middle is called a meniscus. The action of the sinking meniscus pushes water along the walls upwards. Therefore the whole plant gets a drink without the force of a sucking motion like we have to use when we drink from a straw!
Try these simple labs to see capillary action, in action!
Capillary Action Lab 1
Put a teeny-tiny amount of a paper towel edge in colored water and see what happens.
Capillary Action Lab 2
Pull the paper off of a straw by pushing it downwards until it is bunched up like accordion folds. Put the paper worm on the table and add several droplets of water to the center. What happens? **By the way, this is a fun past time to do in a restaurant while you are waiting for your food to be served!
When an innocent bystander watches action labs 1 and 2 and says, “That’s just absorption“, you can tell them that absorption could not happen without capillary action!
Capillary Action Lab 3
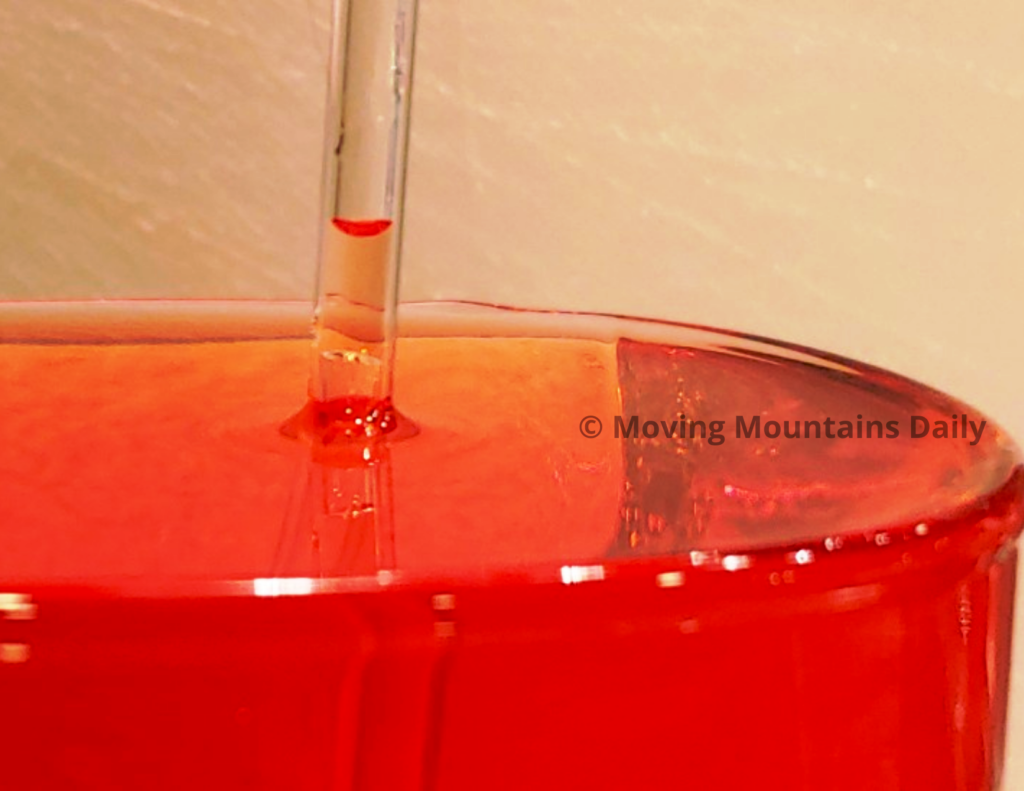
This one can be a bit more difficult to see. For this lab you need a very thin, clear straw or coffee stirrer and a glass of colored water. Put the straw into the glass of colored water without touching the bottom. You will see the fluid inside the straw rise above the water level. If you look really (really) close you will be able to see the meniscus inside the straw. This is not an easy lab because the straw has to be very thin. But just in case you have a difficult time with lab 3, I took a close up shot.
The Problem with Capillary Action
There is one problem with capillary action and it is called gravity. Capillary action by itself can not push water through an entire plant because gravity is pushing down. Plant cells need a lot of water and they are rather impatient when thirsty – just like kids! So capillary action gets help from the leaves of the plant.
Transpiration
Luckily for the cells there is ‘transpiration‘. This process occurs when leaves release water into the atmosphere. The escaping water leaves behind a void, or empty space. Nature absolutely does not like empty spaces and it will do anything to fill it with whatever is available. In this case, transpirational pull takes over and draws more water from the roots to fill the voids. Since nature is in a hurry to fill the empty spaces replacement water flows quickly. Capillary action and transpiration work together to create a continuous, fast flow of water through the xylem pipeline.
A Transpiration Action Lab
Want to see transpiration? Take a green potted plant and zip it into a plastic bag and set the bagged plant on a window sill. Watch as evaporated water released by the plant creates moisture on the side of the bag.
The Inside Story
Being able to store food for the winter dormant period and the complex network of transporting food and water keeps plants alive from season to season!
Now that you have done your reading, completed all labs and pages 1 – 7, it’s time to review. Complete “The Inside Story” using the vocabulary words listed in the margin.
By the Way
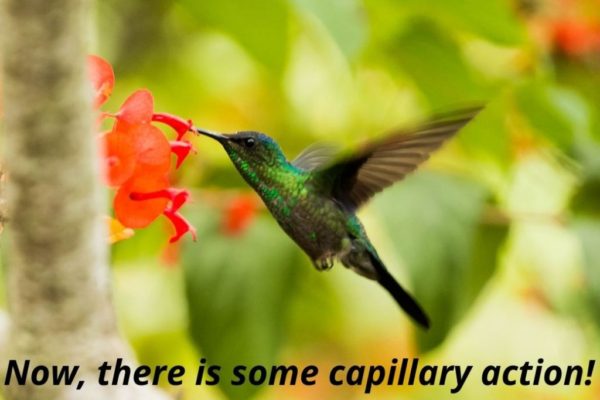
Hummingbirds, do not suck up nectar, they use capillary action! They plunge that tiny, thin beak into the flower’s nectar and capillary action begins!
Vocabulary
Transportation – The movement of products from one place to another.
Dormant – Not active
Starch – Made from glucose by green plants.
Roots – Anchor plants and take in water and minerals from the soil.
Xylem – Tube tissues that transports water upwards from the roots.
Phloem – Tube tissues that transports food throughout the plant.
Vascular Bundles – An organized collection of tube tissues.
Vascular Cambium – Layer of tissue separating the xylem and phloem.
Collenchyma Tissues – Rigid tissues supporting the stalk.
Hypothesis – An educated guess before completion of a lab.
Control Sample – Part of an experiment that does not change.
Molecules – Two or more atoms of the same substance joined together.
Capillary Action – Movement of liquid upwards without suction.
Cohesion – Force of the same type of molecules sticking together.
Adhesion – Force of different types of molecules sticking together.
Bonding – A link that joins the atoms in molecules together.
Meniscus – Sinking effect when liquid molecules are attracted to a container.
Absorption – The act of sucking up a liquid by capillary action.
Void – An empty space.
Transpiration – The release of excess water through leaves.
Transpirational Pull – A force exerted on the water inside the xylem tube to help pull water upwards into the leaves.
